
Have you ever wanted to include a date picker on your WordPress or WooCommerce store? All you need to know has been detailed in this article.
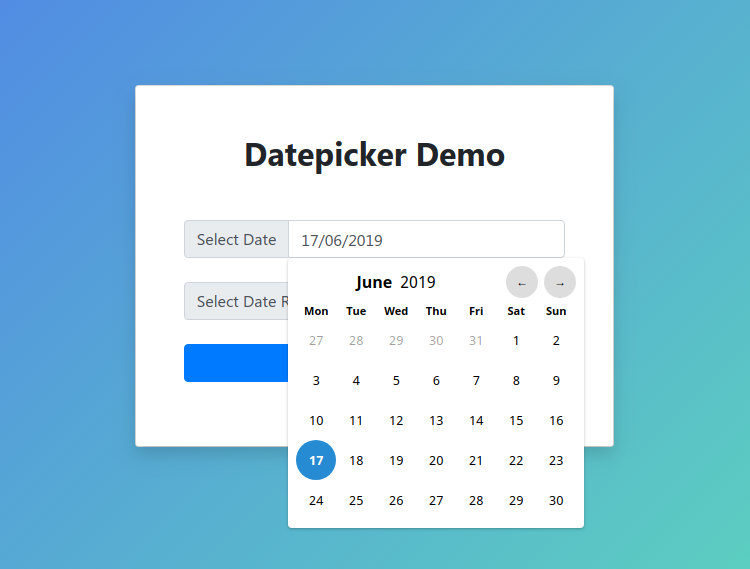
A date picker is an example of an advanced input field. I’ll show you how to add a date picker to your WooCommerce product pages so consumers may choose one or more dates for pickup or delivery.
When Do You Need a Calendar Field?
Date pickers are quite useful typically when you are running an eCommerce store and you would like to have users select the delivery date or pick up date.
1. Install the plugin
These are the steps to install Advanced Product Fields for WooCommerce:
- If you haven’t done so already, get the plugin here.
- Download the plugin and install it on your WordPress site via Plugins → Add New.
- Once you’ve installed and activated the plugin on your WordPress website, navigate to WooCommerce → Settings → Product fields from the dashboard to activate your license key.
2. Enable the date field in the WooCommerce settings
Go to WooCommerce → Settings → Product Fields and enable the date field there:

On the same screen, you can also define the date format to display all dates in.
3. Add a date picker field to a WooCommerce product
Edit the product you’d like to add a date picker field to via WooCommerce → Products. In the Product data metabox, navigate to the Custom fields section and click Add your first field.
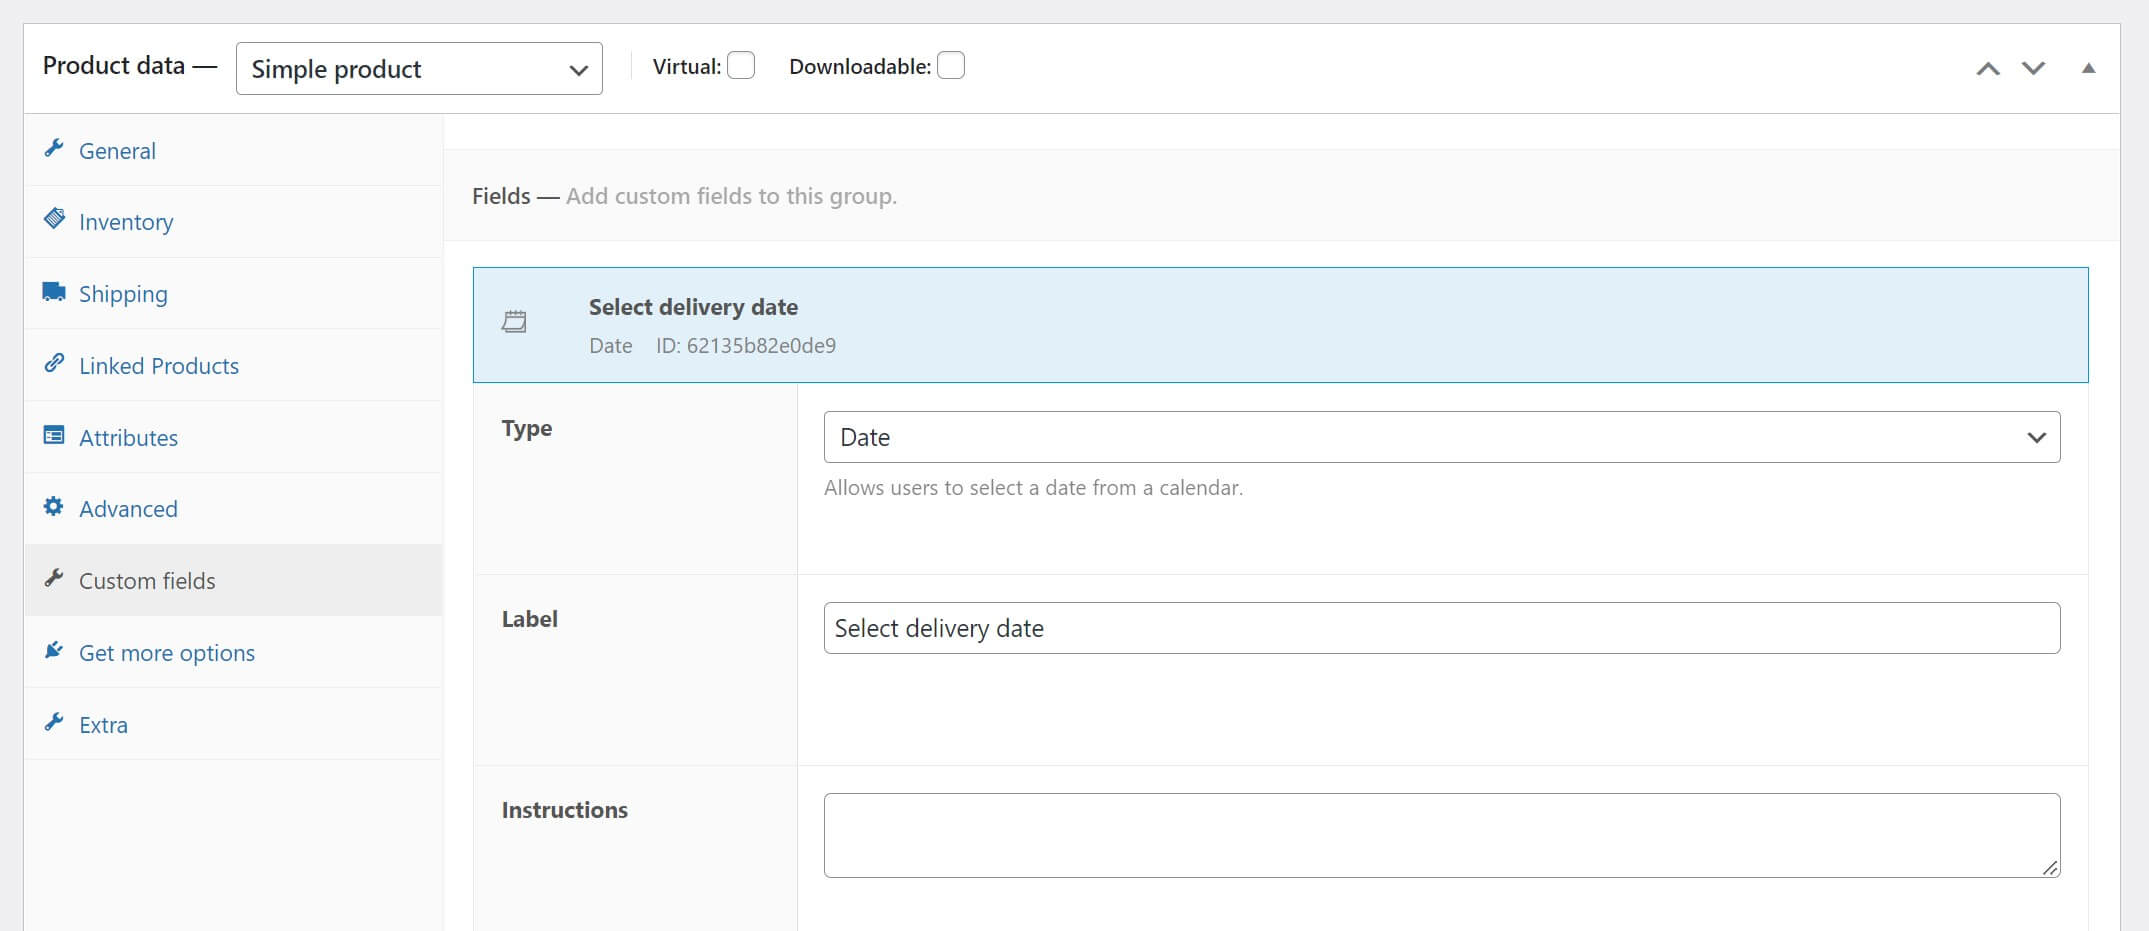
Set the field’s Type setting to Date and add a label, such as “Select delivery date”. Now save your product. This will add a date picker field to the WooCommerce product page!
4. Adjust the calendar settings
You’ll probably want to configure some restrictions to the calendar. For example, users shouldn’t be able to select dates in the past. Advanced Product Fields for WooCommerce, especially its Extended version, has plenty of settings to configure your date calendar field. Let’s go over all the available settings:
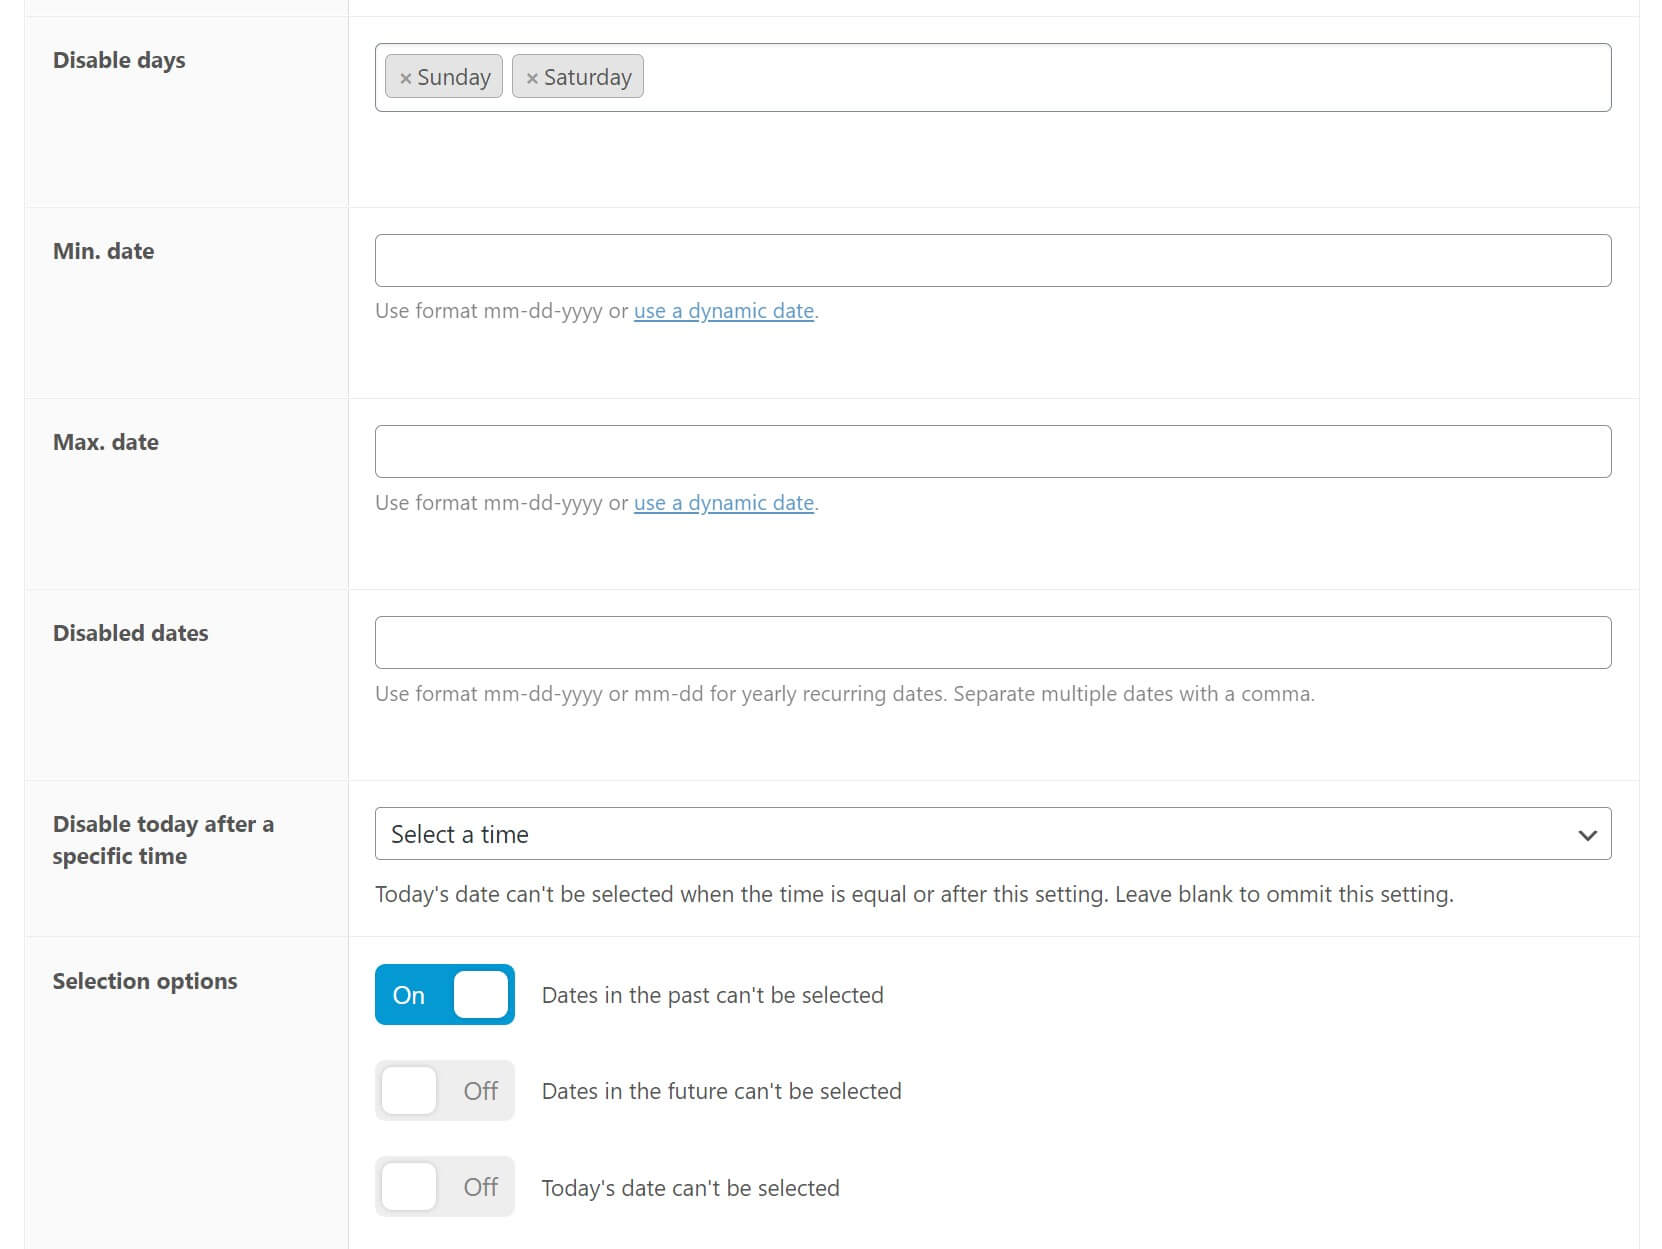
- Disable days (available in the Extended version): Define which weekdays (such as the weekend: Saturday & Sunday) can’t be selected.
- Min. date (available in Extended version): Define the minimum date that can be selected. Any date before that won’t be valid. You can also add dynamic values such as “7d” which means “7 days from today”. For example, if you run a print shop and your delivery time is 2 days, you can make sure your customers can’t select today or tomorrow for delivery.
- Max. date (available in Extended version): Define the maximum allowed date. Any selected date after that won’t be valid. Just like the min. date setting, you can add dynamic values.
- Disabled dates (available in Extended version): Define a comma-separated list of dates that can’t be selected. This setting is handy to define vacation days or holidays.
- Disable today after a specific time (available in Extended version): This setting allows users to select today’s date only if the current time is before the specified time. This setting prevents delivery businesses from delivering on the same day when it’s already too late in the day.
- Selection options: This allows you to define if dates in the past/future should be selectable.